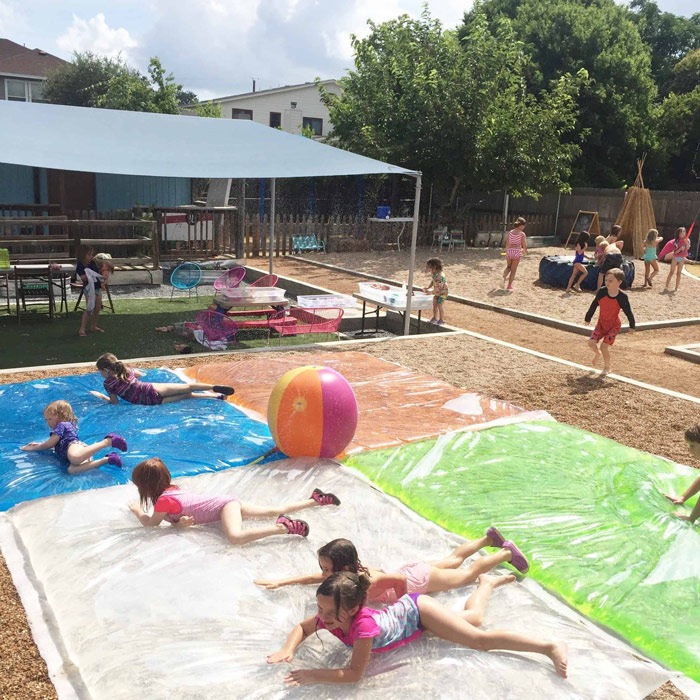
The next time you are searching for a kids’ play idea, take a look at this list of water activities for kids featuring the humblest of natural substances. These water play ideas may seem simple but I have seen kids ages 2-14 scramble to take part in them. I don’t know if it’s because on a hot day they cool you down or because we never tire the sound of splashing and pouring but if there is water involved I can guarantee you’ll have excited children on your hands!
We explored a number of water activities for kids at Camp STEAM last summer and it was a great way to incorporate STEAM learning opportunities into play. I’ve included a list of some our favorite STEAM water activities along with a few that are on my must-try list for next summer! Keep this list handy for summertime or a fall/spring heat wave!
Quick tip: Set up a couple of these at once. We liked pairing water activities together so that there was enough room around each station and so that kids have a couple of choices about which activity they want to try.
Note: This post contains affiliate links.
10+ Irresistible STEAM Water Play Ideas
1. Animal Rescue
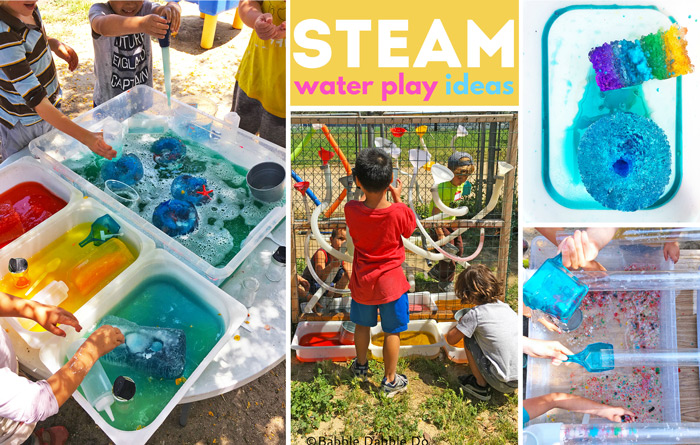
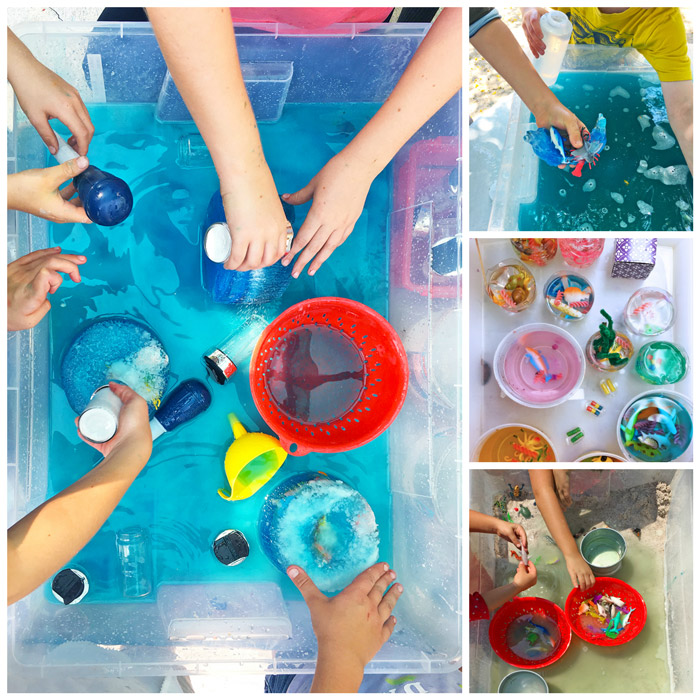
 This activity is from Mama Papa Bubba and we set it up three times this summer both at camp and a kinder play date. I cannot tell you how much kids loved the challenge of rescuing animals trapped in ice! I mean LOVED it! Go here for complete instructions
SAFETY WARNING Salt water stings eyes! If doing this project with lots of little ones I highly recommend using safety goggles like these to prevent salty water from splashing into the children’s eyes. I also recommend having a bucket of soapy water nearby to rinse the salt water off their hands once they are done.
There are a lot of ways to incorporate science and STEAM into this simple activity. Here are some of the things we talked about:
- Chemistry: Salt and Ice- Salt hastens the melting of ice because salt lowers the freezing point of water and makes it harder for ice to stay frozen as a solid. Equip kids with salt shakers and squeeze bottles and ask them to rescue the animals with science!
- Biology: We set up a bin with some play sand and water in it next to the bin where the ”rescue” was taking place. As the animals were rescued the kids transported them back to their “habitat” whether that was the beach, shoreline, or ocean. As each animal was freed from the ice we talked about what type of animal it was, fish, mammal, bird, or crustacean and where it lives.
- Design and Engineering: Completely on their own, some of the kids decided to create a sanctuary where the animals could be rehabilitated. They designed different stations to help each animal recover from being trapped in the ice. It was amazing to listen to their ideas on what an animal hospital/rehabilitation center would include!
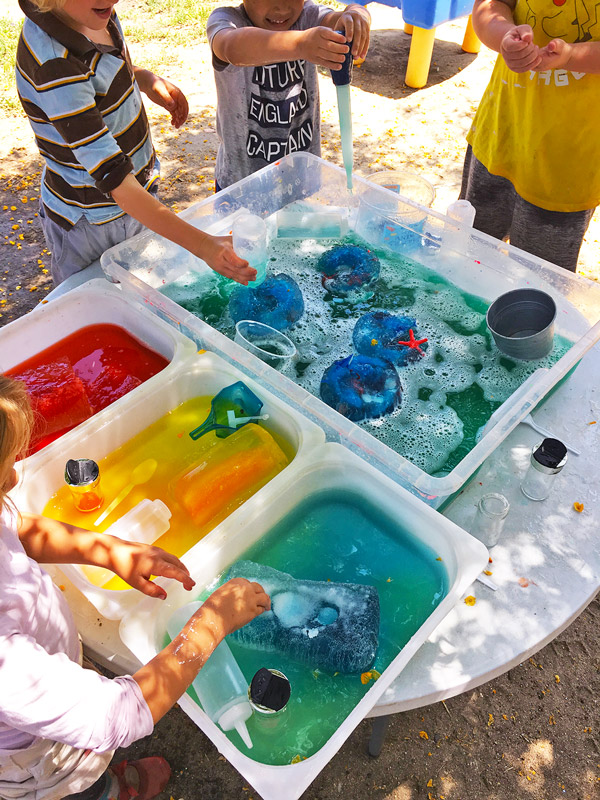
2. Pouring Pearls AKA Tapioca Tubes
Tapioca Tubes are an offbeat idea I developed based off my admiration for the creations of Tom Bedard and one that kids LOVE! I originally made this contraption for preschoolers but this summer we recreated it for older kids and even our teenage camp counselor got involved in the action! The idea is to set up a simple structure with tubes between large bins through which kids can pour colorful tapioca pearls back and forth. See how we made it here. Be sure to weigh down the center box if a lot of kids are using this at the same time.
A new STEAM Twist: One of the challenges we tried with this activity was to place cool colored tapioca pearls in one of the bins and warm colored pearls in the opposite bin. Then we asked the kids to try and make the same color in both bins by transferring the pearls back and forth through the tubes. Because the tapioca pearls lose some of their color as they sit in water eventually we ended up with two bins of matching colored water.

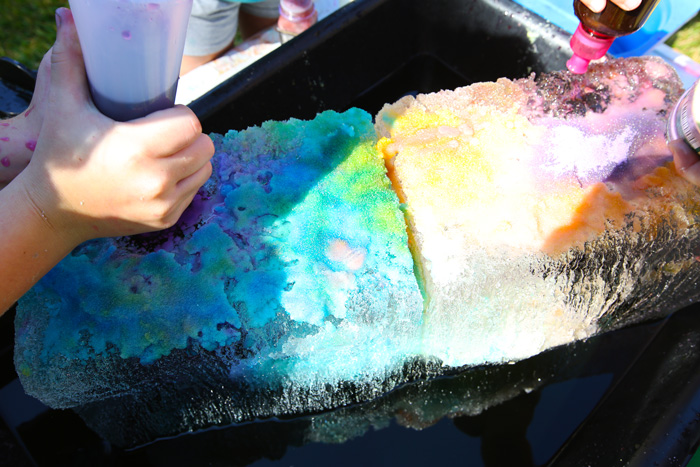
3. Color Melting
Here are a few ideas for color mixing water activities for kids with science thrown in! They are similar to the ice sculptures idea below with the caveat that they focus primarily on color mixing.
Materials
For the Ice
- Recycled milk or juice cartons
- Food coloring
- Water
- Tapioca Pearls (optional)
For Play
- Large White tubs
- Salt and salt shakers
- Squeeze bottles filled with water
- Small buckets and scoops
For single color blocks of ice simply fill an empty milk carton with water and a generous squeeze of food coloring in one of the primary colors. Swirl the carton to mix the color, then place in the freezer overnight. Repeat with two additional primary colors.
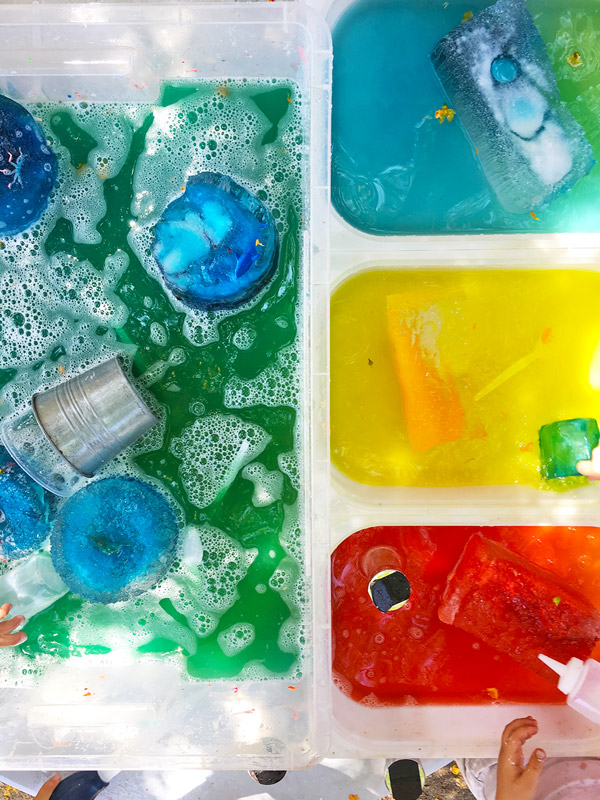
To Play
Option 1: Place each block of colored ice in a separate container. Invite the kids to melt the ice blocks using salt and water. Have a bucket of water nearby to refill the squeeze bottles. As the color melts the kids can scoop the water between the tubs to create the secondary colors.
Option 2: Make six blocks of ice (2 of each primary color). Place a red and yellow block in one tub, a red and blue block in a second tub, and a yellow and blue block in a third tub. Invite the kids to melt the ice blocks using salt and water. Ask them to observe the secondary color that appears in the bottom of each tub as the ice melts and the two colors mix.
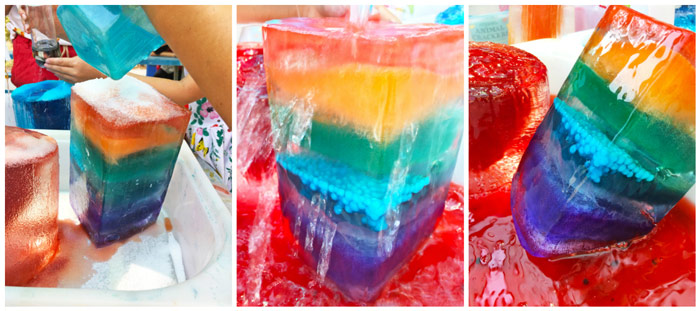
Rainbow Ice Block Instructions
Note: These take several days to create because each layer needs to be frozen before adding the next.
- Step One Mix red food coloring with 1 1/2 cups of water.
- Step Two Pour into an empty milk carton and freeze for several hours or overnight.
- Step Three Repeat step one with each of the remaining colors of the rainbow. You will need to freeze each layer before adding the next.
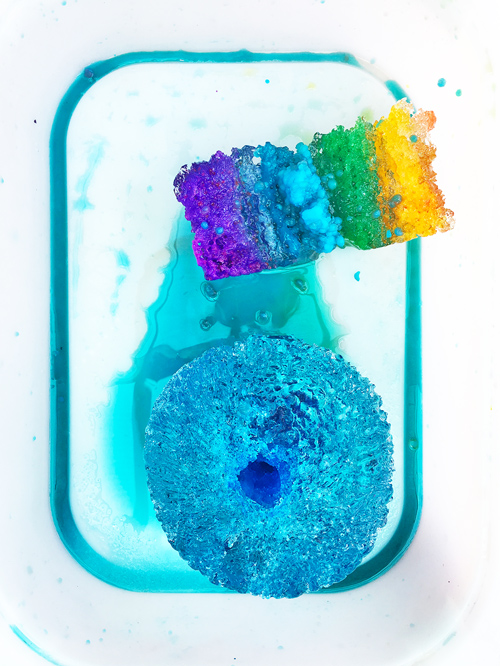
- Step Four (optional) Add in colored tapioca pearls along with the water for one or two layers. This add an extra element of surprise and a challenge to melt the ice to release the pearls.
To Play:
Place the rainbow ice block in a white tub and melt using salt and water. Ask kids to observe what color the water turns as the ice melts.
The Art: Color melting is a great opportunity for kids to learn about primary and secondary colors. When two primary colors (red, yellow, and blue) are combined a secondary color appears. The secondary colors are orange, green, and purple. Depending on the amount of each primary color used or the ratio, say red to yellow or red to blue, the tint of the secondary color will be different.
The Science: Salt affects ice in a unique way. Typically water freezes at 32 degrees Farenheit, however salt actually lowers the freezing point of ice. When salt is dissolved in water it breaks into sodium and chloride ions and those ions make it harder for water molecules to bond together. This has the effect of melting the ice faster when exposed to salt.
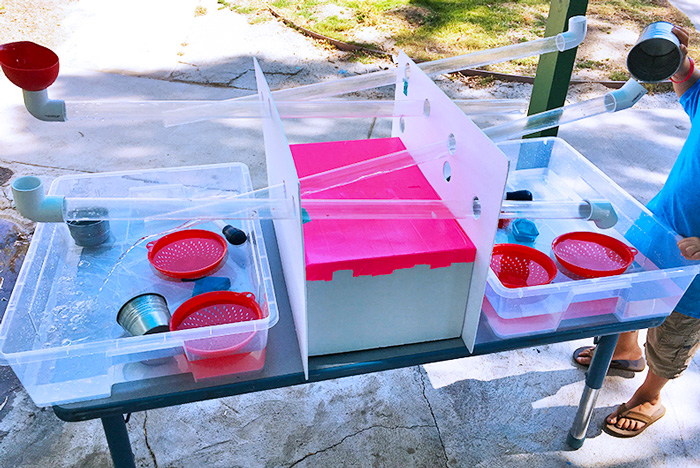
4. Water Wall
I put this up each summer and I always find kids milling over to pour water and reconfigure the tubes. Adding in bins with different colors of water allows the kids to trace the path of the water as it moves through the colored tubes. Go here to see how we made our freestanding water wall.

5. Color Mixing Lab
This water activity for kids is from my book STEAM Play & Learn. It’s so simple you may be tempted to skip it but I tell you there’s magic in color mixing! Challenge children to mix as many different colors possible in an ice cube tray using just the three primary colors and water.
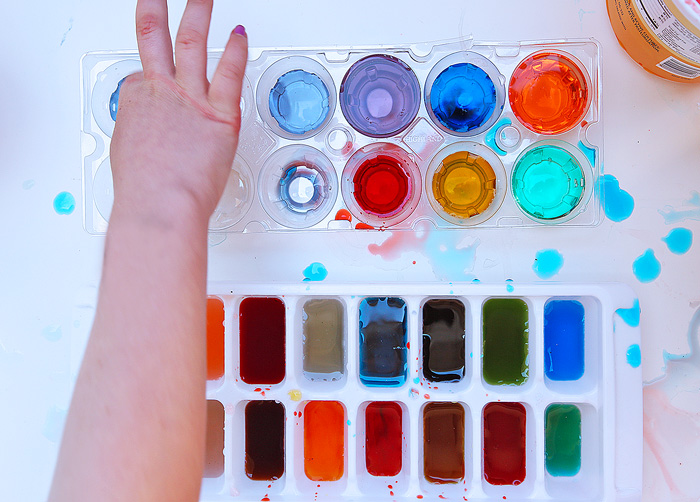
The Science: Color is perceived by special cells in your eyes called cone cells. Cone cells are affected by light so in bright light they can perceive detail and color. Other cells called rod cells work in dim light but they can only perceive black, white and gray so that’s why in dim light it is harder to distinguish colors. Try the experiment outside on a sunny day then bring it inside to a dim space. Observe how the colors change depending on the amount of light around you.
The Art: Like our color melting science experiment this project is a chance for kids to observe how the three primary colors can be combined to create secondary colors.

6. Ice Sculptures
If you want to go big with this water activity head to your local ice store (if there is one nearby) and purchase a HUGE block of ice! Just make sure you have a way to transport and store it until ready for the activity! Read how we set this up here.
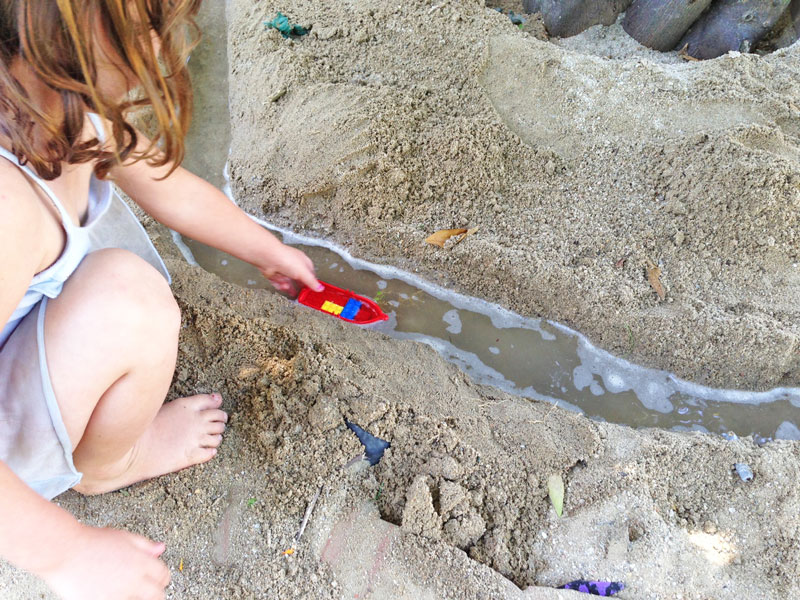
7. Sand Rivers
Parents and teachers will be thrilled with how much STEAM this project packs in and kids will be thrilled with being able to play in the water on a hot day! All you need is access to sand and water and you have the makings of the best engineering activity on hot day! See how to do this in a backyard sand box, on the playground, or at the beach here.
4 More Water Activities for Kids featuring STEAM ideas
In addition to the STEAM water activities above here are a few more from our must try list!
1. Rainbow Water Blobs
This is one of the water activities I planned on doing, bought all the materials for, and then ran out of time to make before camp started…Water blobs illustrate how water behaves when forced into and contained within a sealed shape. Here’s some more ways to bring in the STEAM:
The Science: Water blobs offer a unique way to demonstrate water displacement. Have kids stand on the water blob and then lay on it. How does the position of their body on the blob affect how much they are supported by the water? Objects float when the amount of water they displace weighs more that the object itself. You displace more water by exposing larger portions of your body in a laying position than when standing up. When you lie on top of the blob you float closer to the top because you are displacing more water. When standing on the blob your feet displace only a small amount of water, not enough to support you. Your feet will sink lower to the bottom of the blob.
The Engineering: I did make a small test version of the blob that had some leaks. My son worked with me on it and it was an engineering task for us to determine where the leaks were and how to patch them up. You can definitely talk a lot about strength materials and engineering observations with this project.
2. DIY Water Table
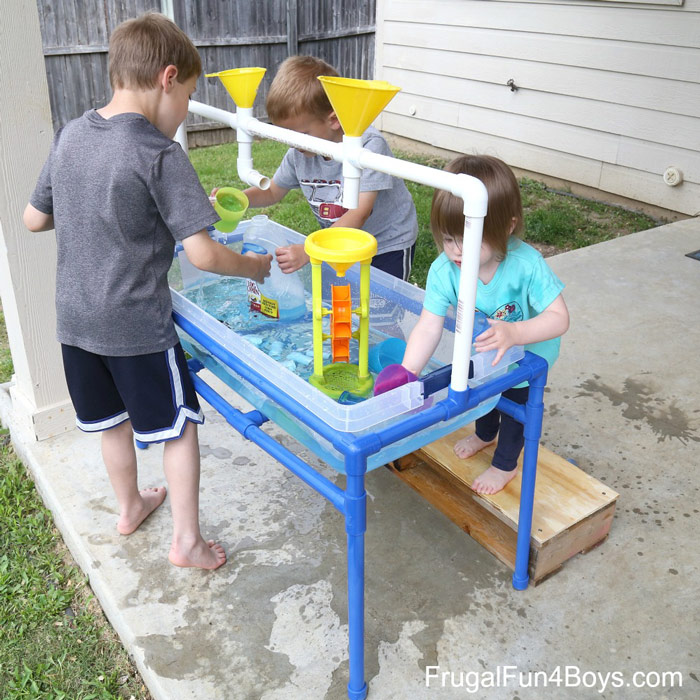
You can of course buy a water table but I love this DIY version made out of simple hardware store materials. It’s a building project for the whole family that will introduce them to a variety of design and engineering challenges. Not to mention it’s fun to play with afterwards!
And last but not least….
These final two water activities are from one of my favorite blogs Sand and Water Tables by Tom Bedard. His creations that help kids explore gravity, engineering and design are incredible!
3. Suds Painting
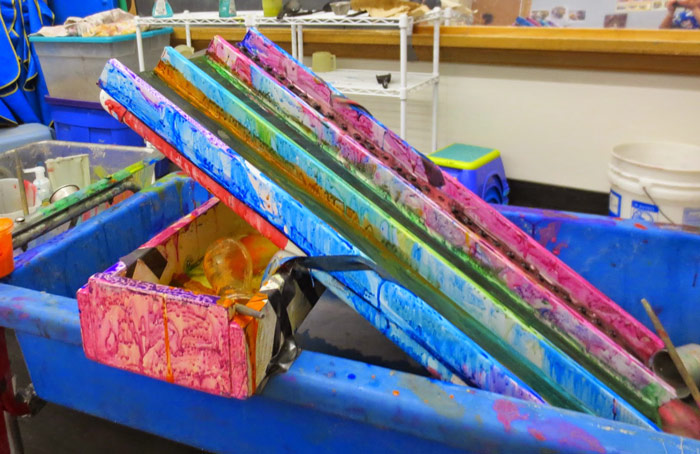
Suds Painting is an excellent idea for exploring color mixing and how ramps work in one messy play project!
See the activity here and the channel board instructions here
4. Table Top Tubes
I also like this set up for tubes and funnels on simple bin. It uses really easy to find materials and allows kids to explore gravity and engineering at the water table.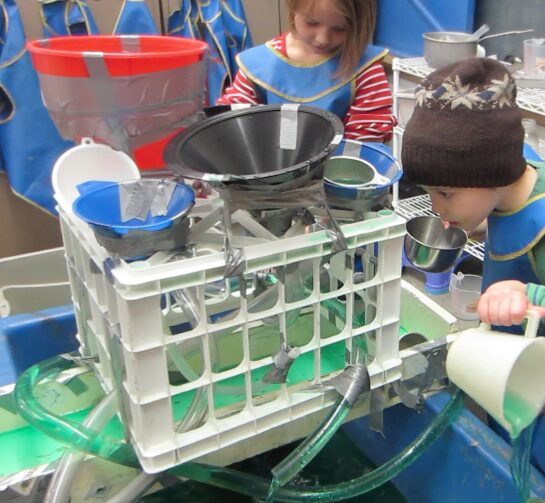
Phew! Are you inspired yet? These water play ideas have so much to teach kids about the world around offer a hands-on opportunities for kids to explore STEAM through play.
Are you passionate about raising creative kids?
Join over 22,179 parents and educators who want connect with kids and nurture their creative process through magical, easy projects you can do TOGETHER.
Subscribe to our email list to receive project ideas as well as offers for some our creative products.
If you want to read our privacy policy before subscribing, hop over here.
Leave a Reply