
Escape rooms are all the rage among students today! I will admit that I was slow to jump on the bandwagon due to the time constraints I have as a teacher to commit to building one of these, but then I learned about digital escape rooms using Google Forms and decided to give it a try! I found that these were fairly easy to create and didn’t require many supplies such as locks, boxes, maps, etc. So, I got to work and created my very first digital escape room, which you can find for sale here. For this digital escape room, I created five separate tasks that target literary devices and close reading skills in order to derive the passwords needed to unlock each digital lock. I turned it into a Super Mario Brothers’ themed game where each lock represented defeating a villain from the old original Super Mario Brothers game (because I’m a child of the 80s, and this is my only video game reference— lol!).
Here’s how you can create your very own digital escape rooms using Google Forms!
Step One: Select a Skills Focus
Just like with every assignment you create, the first step is to begin with the end in mind and decide which skills you would like to assess using the escape room. This will help focus the tasks you create to open each lock. Think about using quizzes you’ve already created and bundling them together to create the various tasks of the escape room. Once you’ve selected your targeted skill(s), then you will need to create 4-5 challenges. Keep in mind that these activities need to be short enough that students can complete them in a timely manner. I would recommend having students complete the escape room in class as collaborative groups to add in the element of class competition; however, you can also have students complete the escape room as a homework assignment if needed.
Step Two: Create the Tasks
Again, begin with the end in mind and create the four or five tasks that you will have students complete. For my escape room, I created five exercises that targeted literary devices in different ways. These included cloze passages, matching, and close reading. At this phase in the process, do not worry so much about the keys to open the locks. Just simply create tasks that will target the skills you would like to target. Be sure to vary the types of activities so that students are challenged in different ways as they move through the escape room.
Step Three: Come up with a Story
This is where you get to be CREATIVE! Come up with a story that grants a purpose to the challenge of the escape room activity. For example, I turned my escape room into a Super Mario Brothers’ theme in which students have to defeat five villains (including Wario, of course!) in order to help Princess Peach, the princess of alliteration (of course), escape the evil clutches of Bowser. You can make up all kinds of storylines just like video games… something like a story about a treasure that needs to be found, or something like a group of people who are stranded on a deserted island and need to be rescued. Or, you can make them more literal escape rooms and put the “groups” into a haunted mansion or haunted hotel, and they need to escape the zombies without being bitten. Be creative and enjoy the process of creating a story that fits your personality and students’ interests. At the end of the escape room, you can decide if you’d like to give a prize to students (or not) and if you would like for that prize to somehow thematically relate to the story you’ve created. For example, if you do a treasure map story, you can give the winning group a bundle of golden chocolate coins as a prize. Or you can keep it simple like I did and give bonus points or candy to the winning group. I would recommend that you start out simple and then can work on sophistication and creativity as you gain more experience with the process.
Step Four: Passwords & Locks
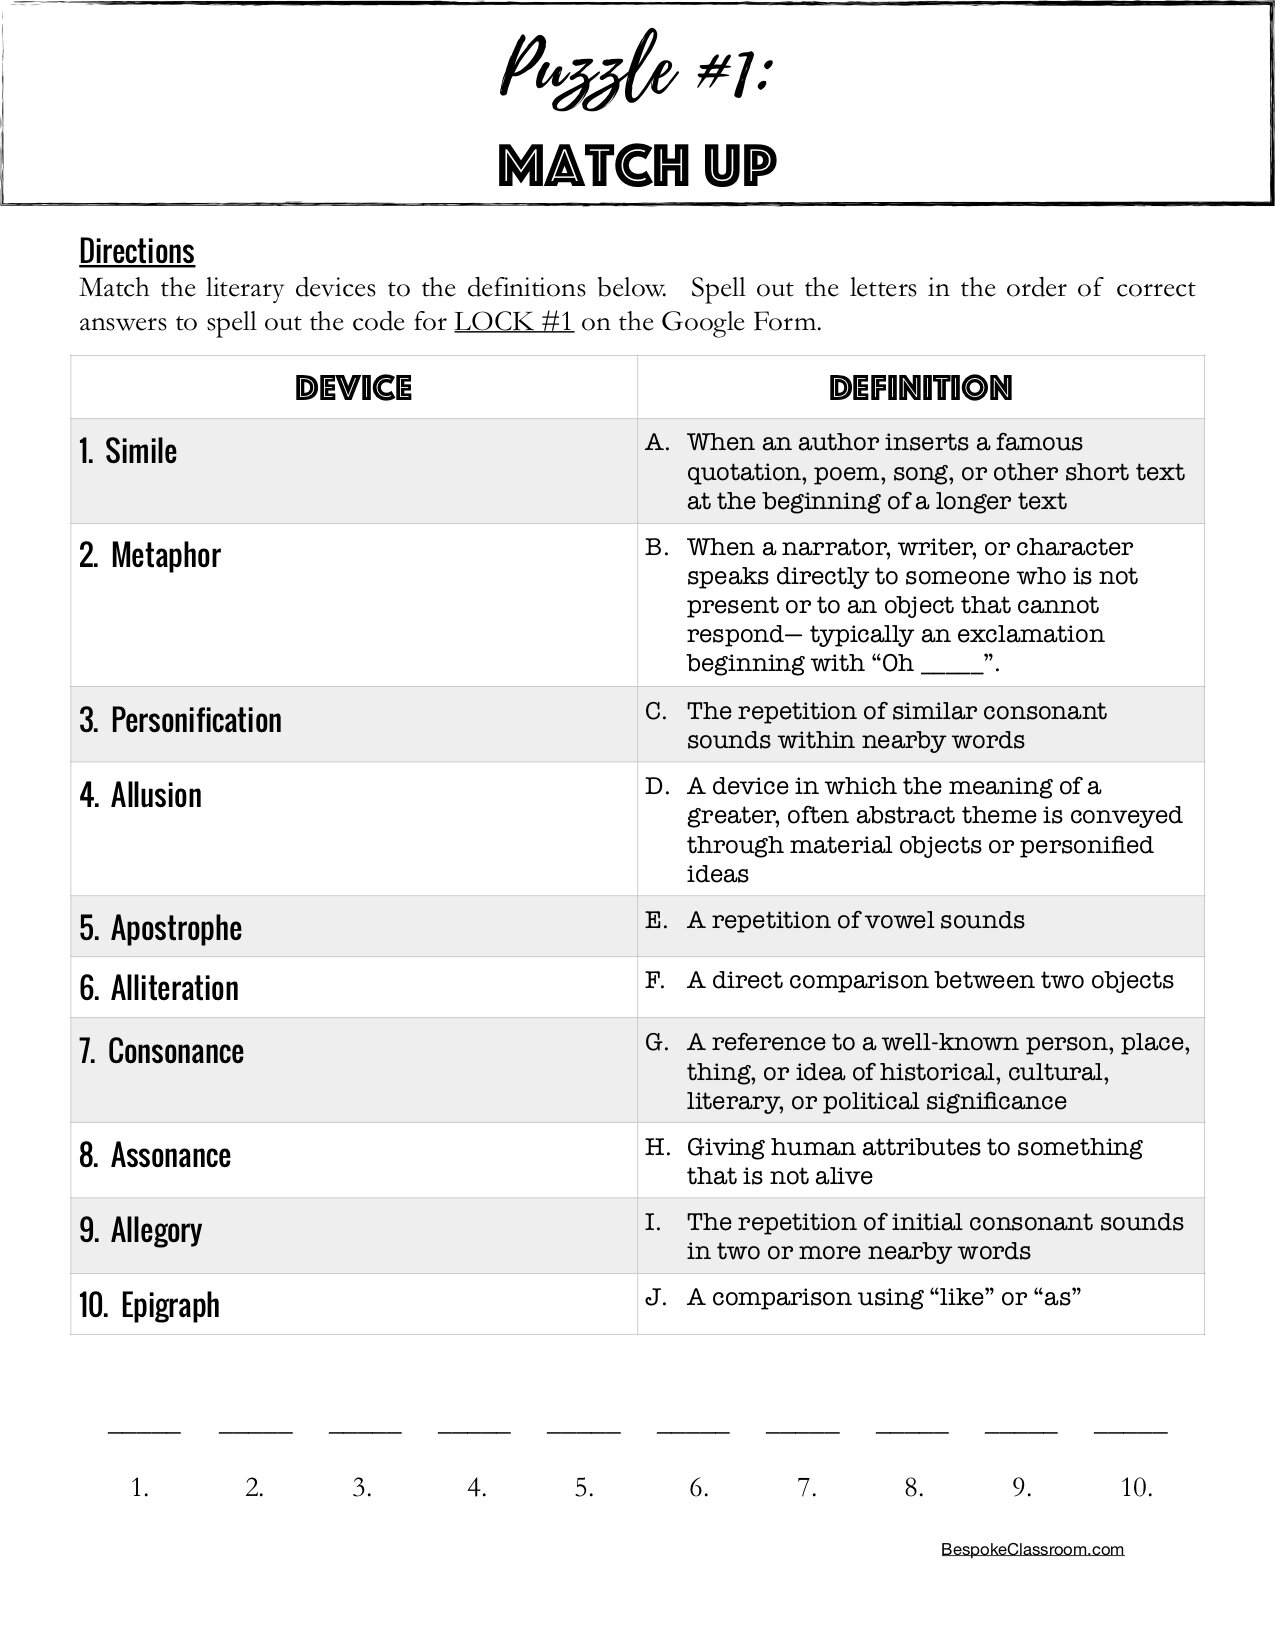
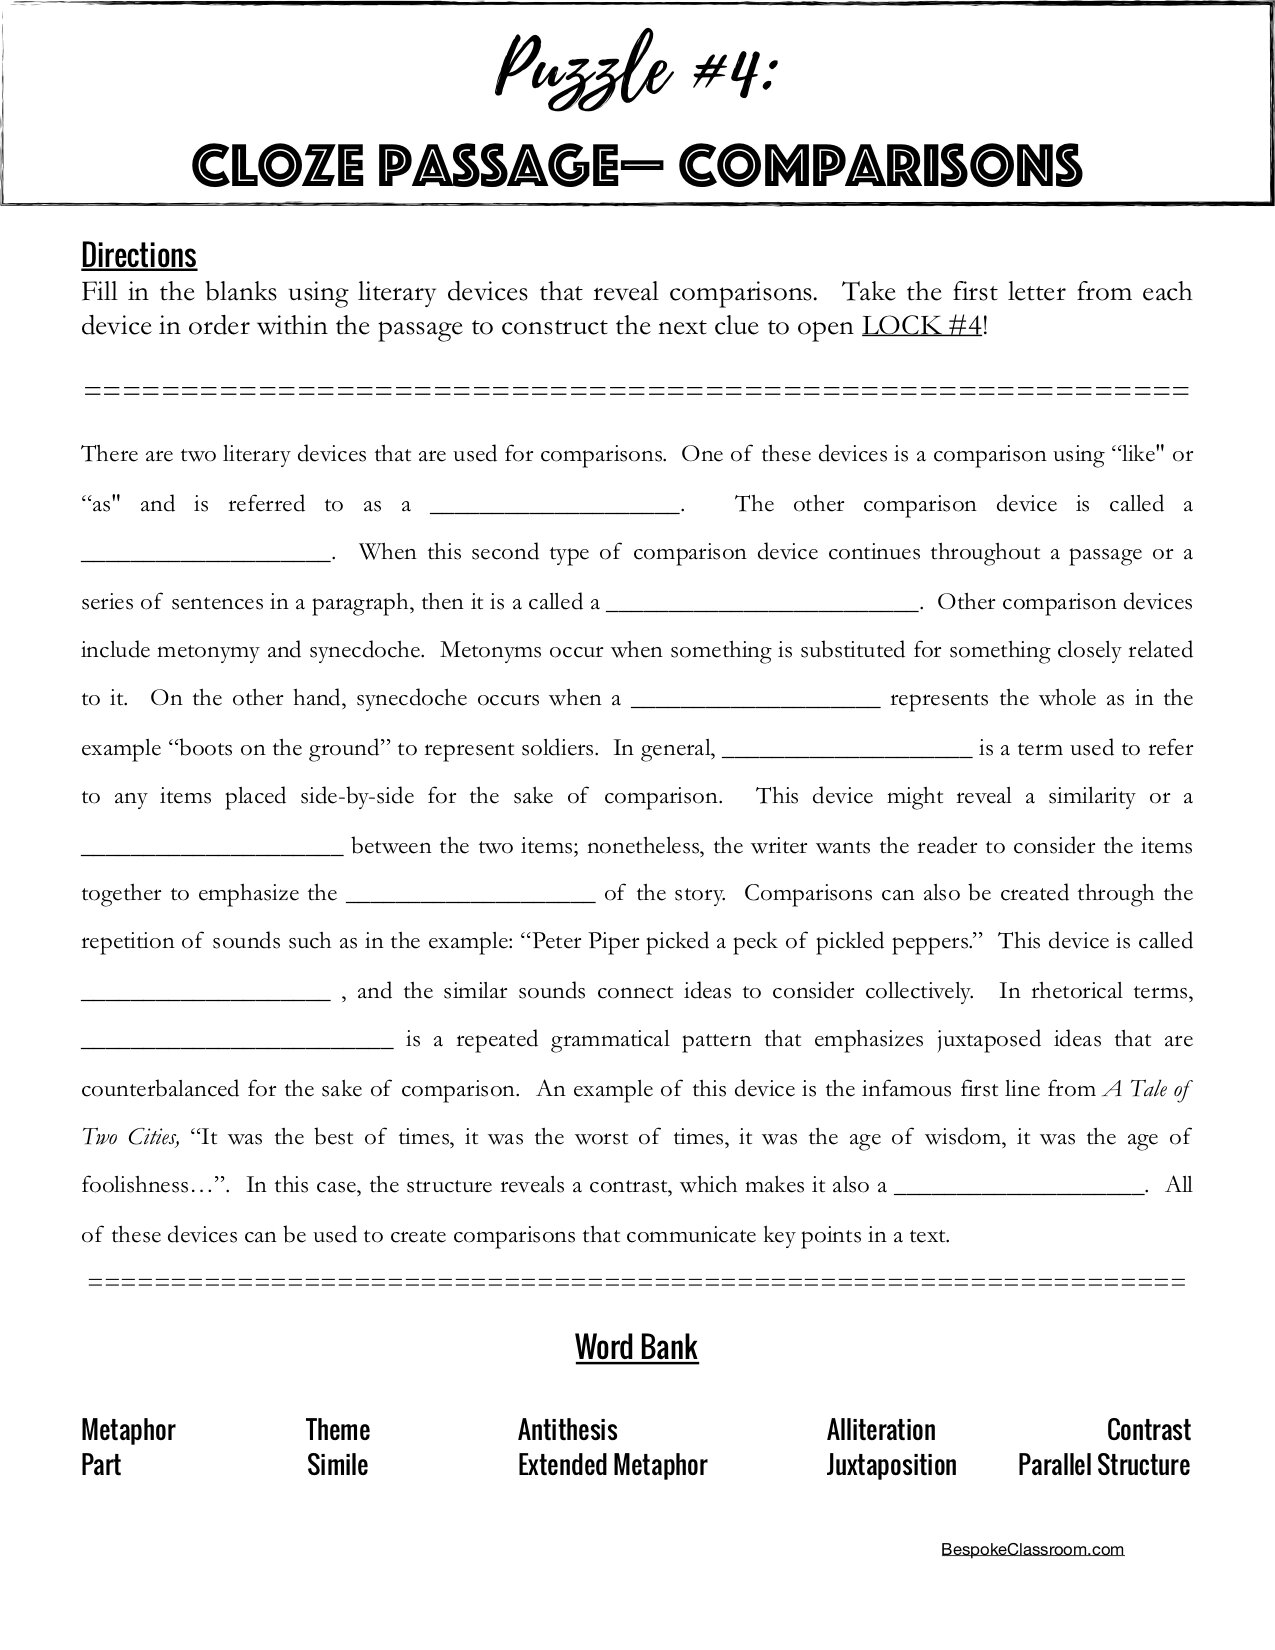
Before we get to the technicalities of creating the Google Form, you first need to come up with special codes for each puzzle that will unlock each lock. These codes can include anything you want— numbers, letters, words, symbols, etc. If you have a matching exercise as one of the puzzles, you can instruct students to take the first letter of each matched word to create the code like I did here:
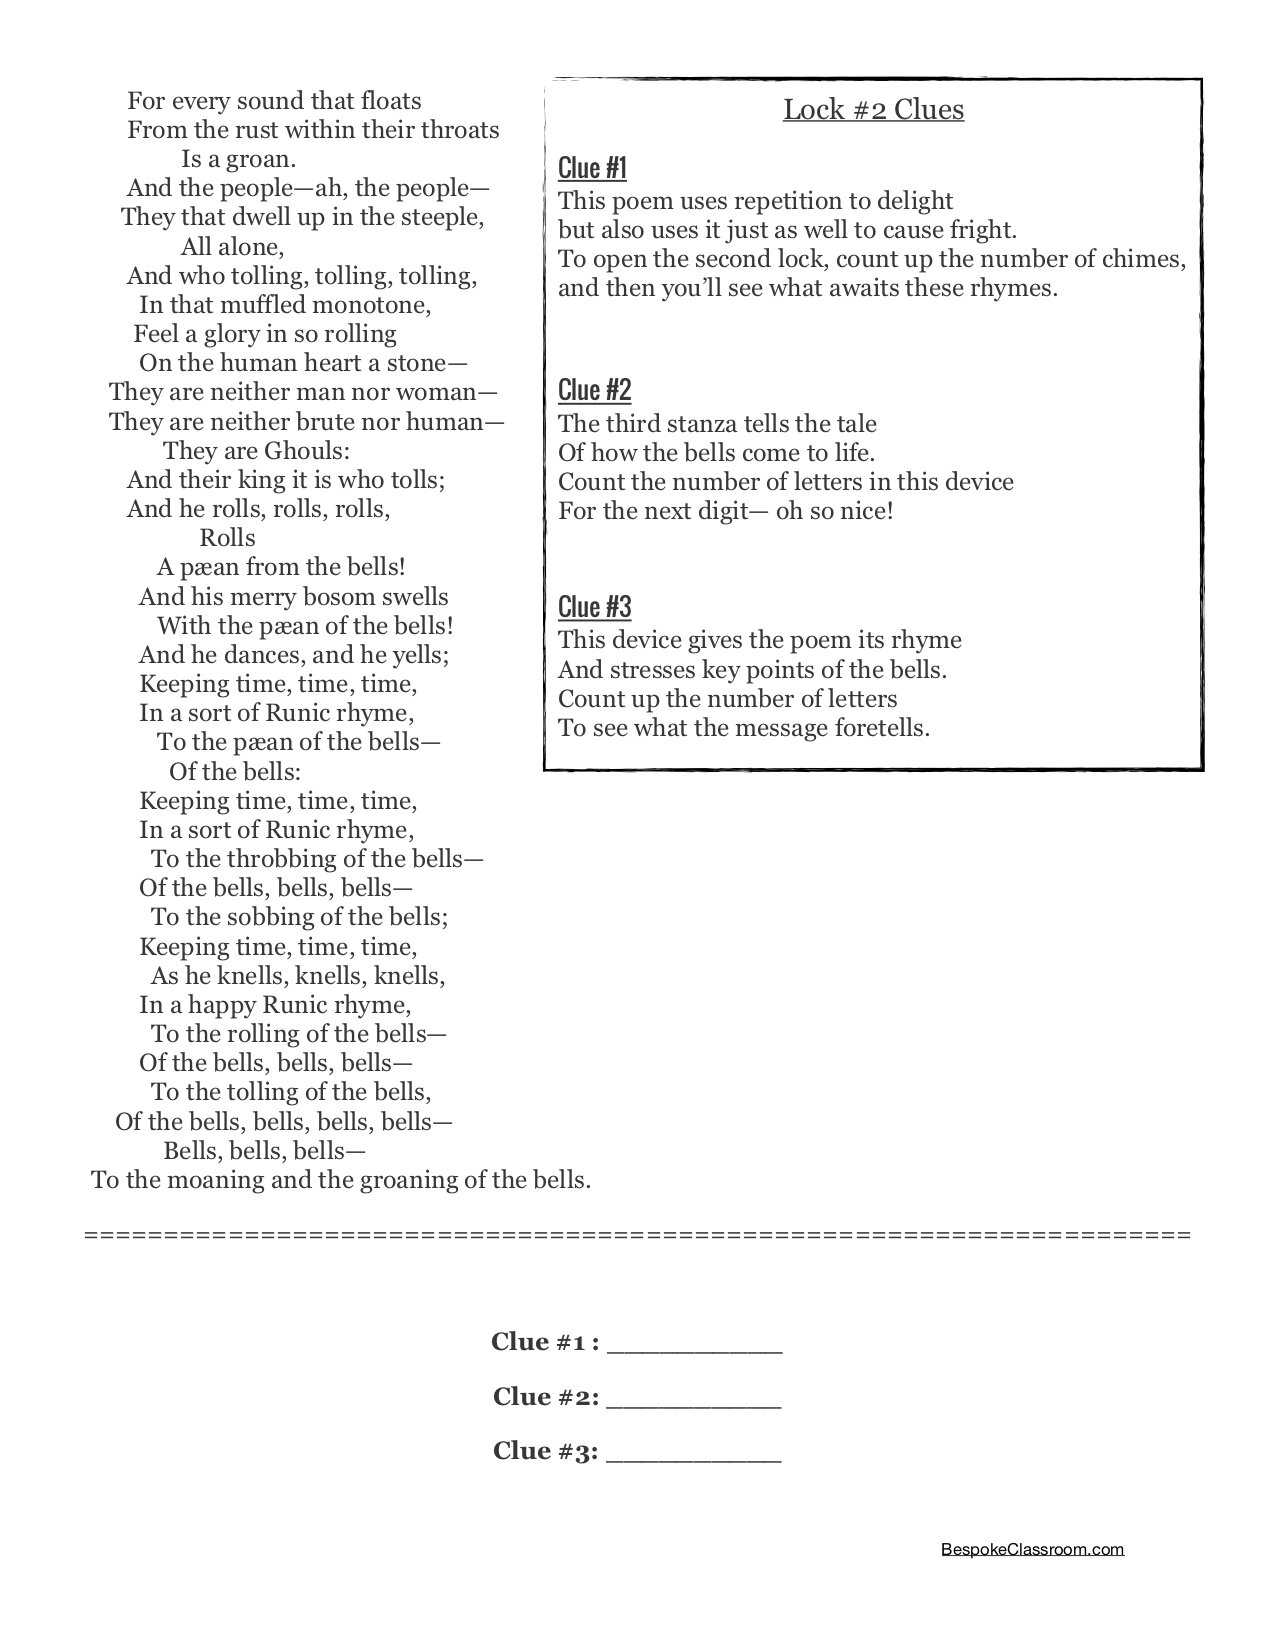
Alternatively, you can create riddles to go along with a puzzle that students have to decipher in order to come up with the code like I did here:
Alternatively, you can have students complete a cloze passage, and use the answers to create a code like I did here:
All of these puzzles are part of the Google Form Digital Escape Room: Literary Devices Version for Secondary ELA. I would recommend using different strategies to come up with the codes across the puzzles to keep the game challenging and interesting for students. Be sure to include clearly written directions on each puzzle so that students know how to complete each task and also how to decipher each code. This is SUPER important! As students work through the escape room, they might find some issues with needing more instructions. Be open to refining your escape room and using students’ suggestions to make it even better!
Step Five: Let’s Get Technical!
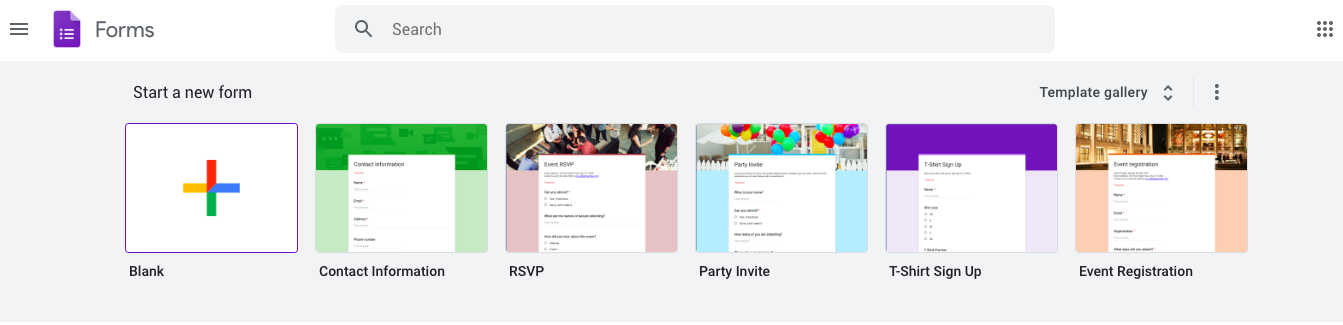
After you have created your 4-5 challenges/ puzzles and come up with a theme plus passwords, it is time to take it over to Google Forms. To create a Google Form, simply go to your Google Forms and create a new one by clicking the plus sign.
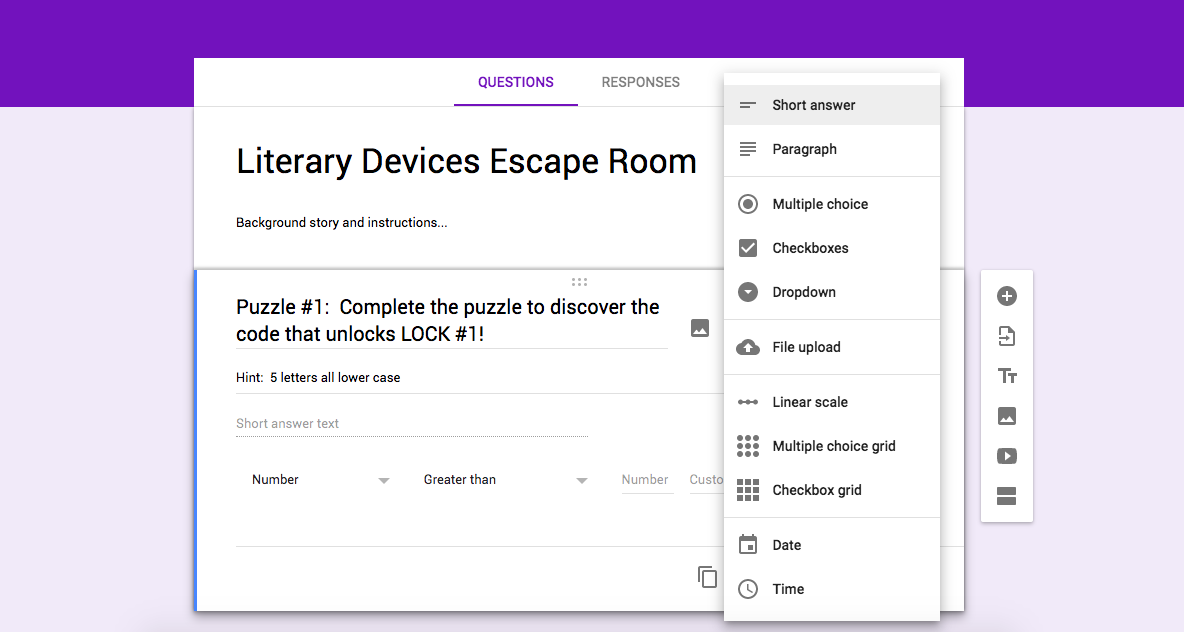
From here, you will first Title Your Form in the white form box at the top where it says “Untitled Form.” By typing in your title, it will automatically also title the form with the same name in the upper left-hand corner.

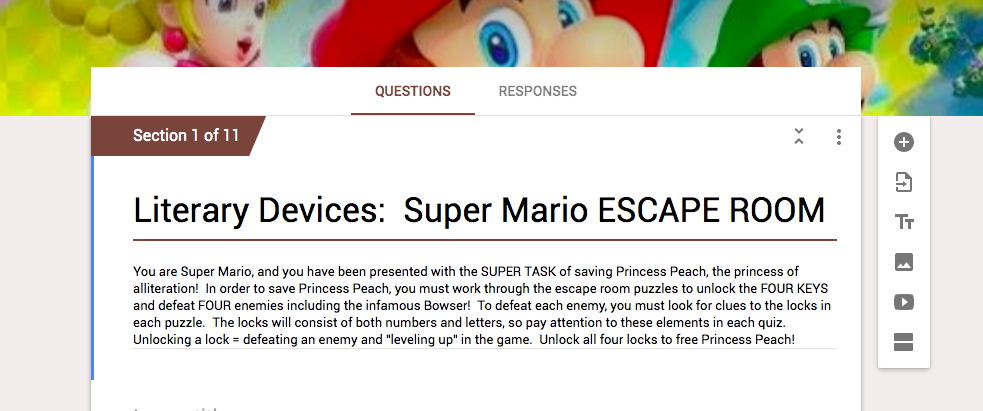
Next, you will tell the creative “story” of your challenge where it says “Form Description.” This is where you will give your students any details or instructions they may need to complete the escape room. Here is what mine looks like for the Super Mario Brothers’ Escape Room.
Now, you are ready to put in the information for each puzzle and “lock.” Begin, by clicking on the three dots on the lower right-hand corner of the form. Once you select these three dots, it will open up two options to show the “description” and the “response validation.” You will want to put a checkmark beside both items to turn them on. Additionally, you will also want to turn on the “required” button to require that students answer the question. This button is located next to the three dots that you just selected.
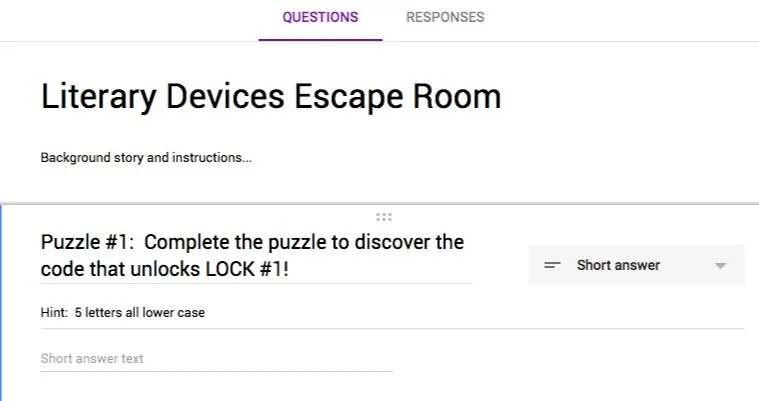
You will then select the type of answer you want your students to answer with. For our case, we will be using the short answer format so that students can input the specific codes for each exercise, or puzzle. Change the answer type to short answer by clicking on the drop-down menu to the right of the description or question. Select short answer and then be ready to input the code that will open the “lock” and send students to the next one.
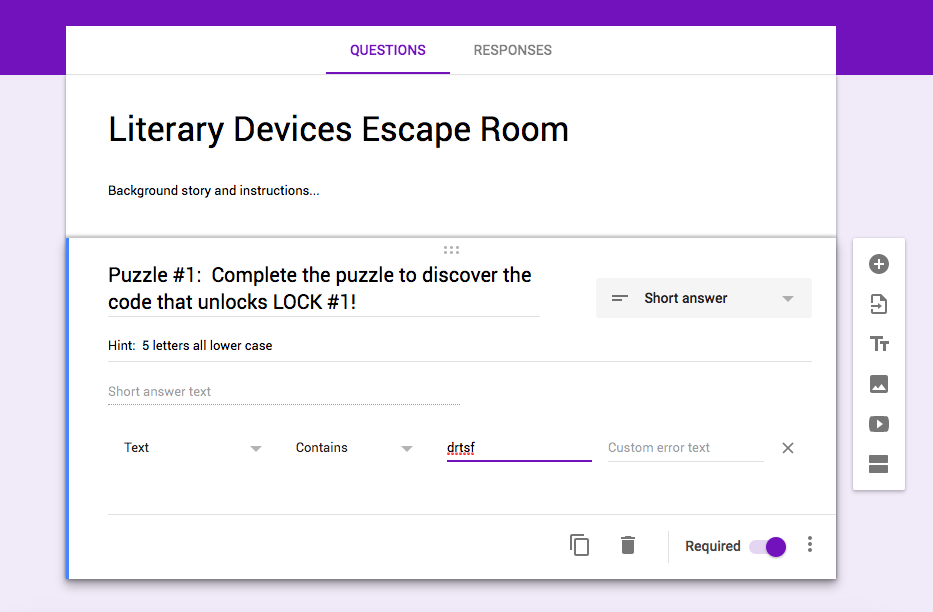
In order to input the code, change the drop-down menu on the left where it says “number” to “text.” Then change the drop-down menu that says “greater than” to “contains.” After that, you will type in the code that will open the lock. Be sure to check, check, and triple check that you have entered the code correctly, or students will not be able to advance in the escape room to the next puzzle. Finally, add in “custom error text.” This is the text that will show whenever students input the incorrect code. You can make this say anything you’d like from “Oh NO! Try again” to something more specific that fits your escape room story such as “Bowser has bashed you again!”


Now that you have completed your first entry, select the equal sign on the bottom of the vertical menu on the right-hand side of the form. This button allows you to add a new section. This is the same button you will use repeatedly to add new sections, or puzzle questions, to your escape room. After each question, you will want to add a new section and then select the photo icon, which is the fourth one from the top on that same menu. This will enable you to add a photo that students will see after they have unlocked a question, or gotten a puzzle code correct. In the case of my Google Form Digital Escape Room: Literary Devices Version for Secondary ELA, these photos consist of pictures of the villains the students have just “defeated.” It looks something like this:

After you insert the photograph, you will select the equal sign again to add a new section. For this new section, you will input the information for the second puzzle and the second code using the same steps from above.
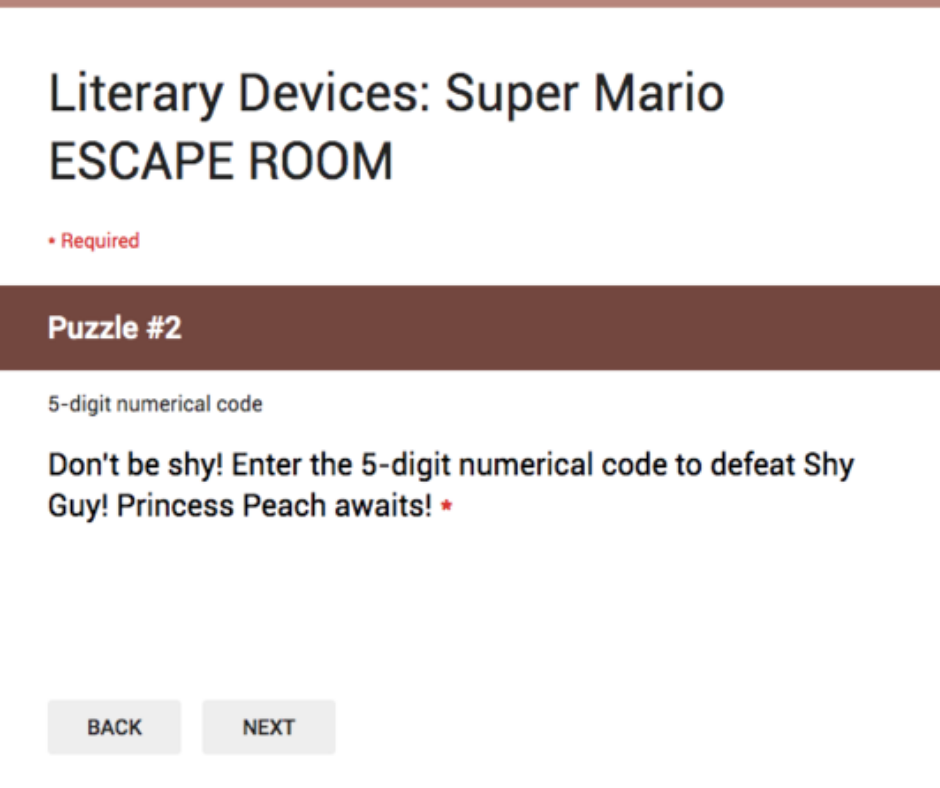
Then, you will input a new section with another photo. Essentially, you will go back-and-forth between puzzle clues/ codes and images— each one has to be a new REQUIRED section so that students will be cued to move through the escape room in sequence. Once they have reached the end, you can give them some kind of victory image that lets them know that they have successfully “escaped” or “unlocked” all of the puzzles.
Tips for Success!
To make this process easy to follow for both you and your students, I would recommend giving each student a hard copy of the puzzles that are stapled together in the correct sequence. For instance, in the case of my Google Form Digital Escape Room: Literary Devices Version for Secondary ELA, I give my students five puzzles that are stapled in chronological order, and students can write on them as they work through each one in order to arrive at the codes to unlock each lock, or defeat each villain.
I would also advise allowing students to give you feedback and help you troubleshoot any hardships you are having with the technology. Students these days know more about this technology than most of us! Give them the opportunity to be a part of the process, and they will enjoy helping you construct an activity that will be effective, useful, and engaging.
Escape rooms are another high-interest tool we can add to our repertoire as teachers to keep students engaged. Give this one a try and see how it works for you and your students!
Product Spotlight
About the Author

Meredith is the founder and creator of TeachWriting.org and Bespoke ELA. She has taught high school English for 10+ years in Dallas, Chicago, and New York City and holds a M.A. in Literature from Northwestern University. She has always had a connection to the written word-- through songwriting, screenplay writing, and essay writing-- and she enjoys the process of teaching students how to express their ideas. Meredith enjoys life with her daughter and crazy Yorkie.